Crochet Crossbody Bag Pattern With a Fold-Over Flap
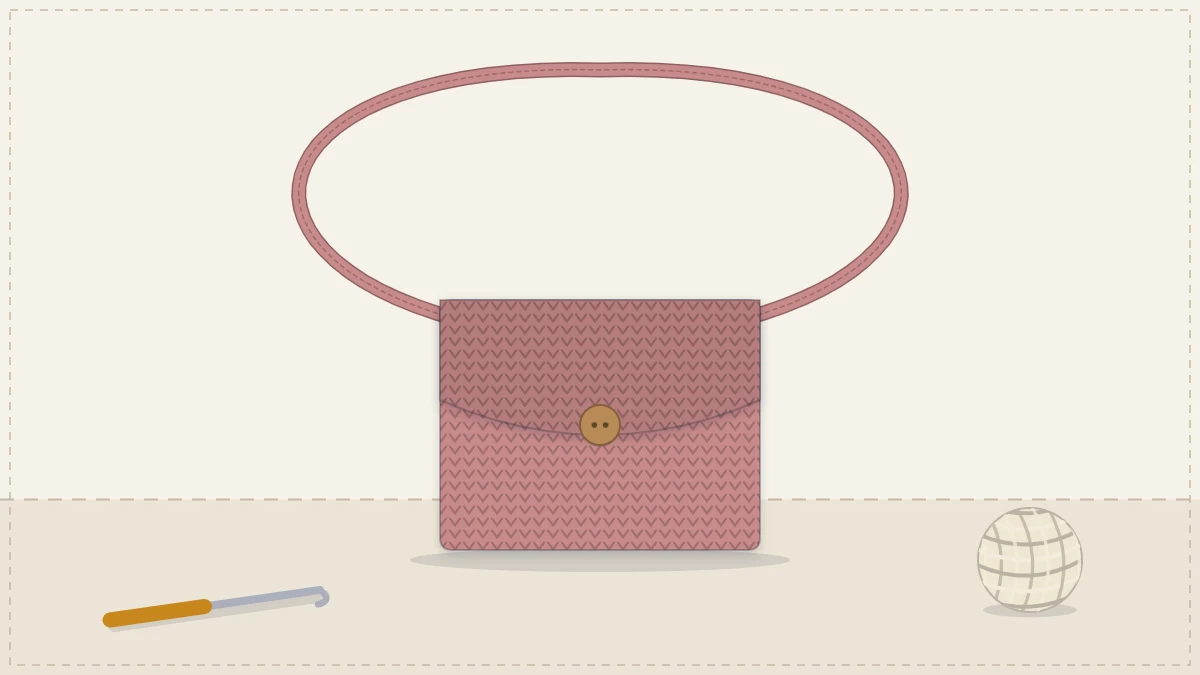
A flat crossbody bag made from one long single crochet panel that folds into a front, a back and a flap, finished with a button loop and a long strap.
Tutorial at a glance
Materials
- Worsted (#4) cotton yarn, about 170 yd (155 m)
- US G-6 (4 mm) crochet hook
- One button, about 1 in (25 mm)
- 2 locking stitch markers
- Yarn needle
- Sewing needle and matching thread
- Scissors and tape measure
This crossbody is a single long strip of single crochet. Fold it twice and it becomes a back, a front and a flap, so the only shaping in the whole bag happens with your hands rather than your hook. Two short side seams, one button, one long strap, and it is ready to wear.
The finished bag is 8 in wide and 6 in tall (20 x 15 cm), flat like an envelope, with room for a phone, a card wallet and keys.
Materials and gauge
- Worsted (#4) cotton, about 170 yd (155 m)
- US G-6 (4 mm) hook
- One button, about 1 in (25 mm) across
- Yarn needle, 2 locking stitch markers, scissors, tape measure
- Sewing needle and matching thread for the button
Gauge: 16 single crochet (sc) and 18 rows = 4 in (10 cm). That is tighter than most worsted cotton labels suggest, and it is deliberate: a firm fabric keeps a flat bag from sagging and stops small items from poking through. If your swatch comes out wider than 4 in, go down a hook size.
How the panel becomes a bag
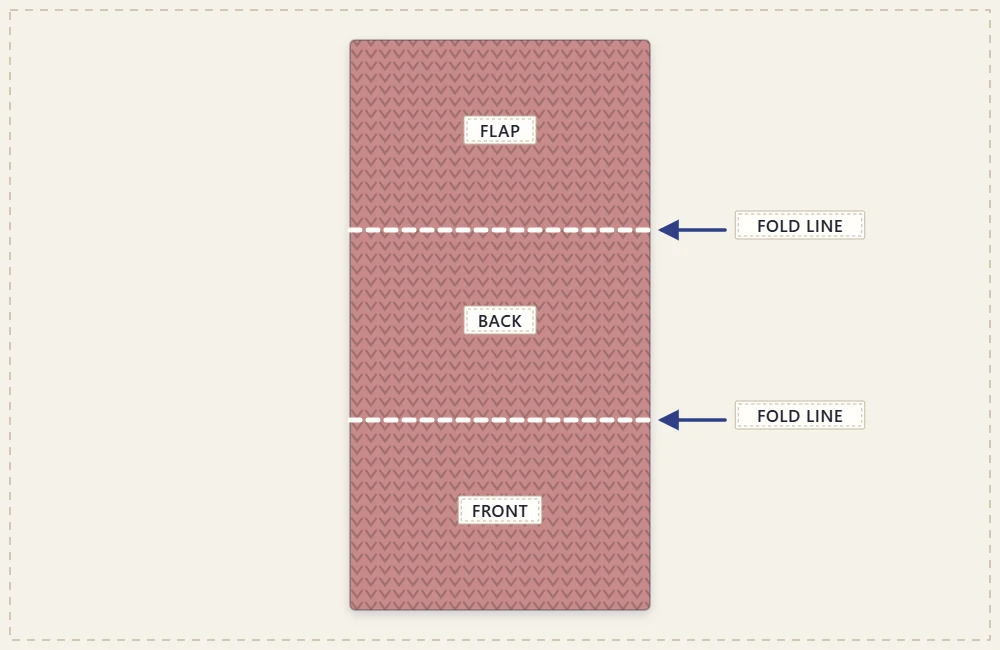
The strip is 8 in (20 cm) wide and 16 in (40 cm) long. The first 6 in (15 cm) form the front, the next 6 in (15 cm) form the back, and the final 4 in (10 cm) fold over as the flap.
Crochet the panel
Chain (ch) 33.
Row 1: sc in the 2nd ch from the hook and in each ch across. (32 sc)
Row 2: ch 1 (does not count as a stitch), turn, sc in each sc across. (32 sc)
Repeat Row 2 until the panel measures 16 in (40 cm) from the foundation chain. At the stated gauge that is about 72 rows, but trust the tape measure over the row count. Count the stitches every few rows: if the total drifts away from 32, the usual cause is skipping the first sc of a row or missing the last one, which hides right beside the turning chain.
Tip
Clip a locking marker to the edge when the panel reaches 6 in (15 cm) and another at 12 in (30 cm). Those are your two fold lines, and marking them while you work saves measuring a floppy strip later.
Button loop row
The loop is worked into the last row, so nothing has to be sewn on at the flap edge.
Last row: ch 1, turn, sc in the first 14 sc, ch 8, skip the next 4 sc, sc in the last 14 sc. (28 sc and one ch-8 loop)
Before you fasten off, push the button through the loop. It should pass with a little resistance, because cotton loops loosen with use. Add or remove a chain or two if needed, then fasten off and weave in the tails.
Fold and seam
- Lay the panel flat with the foundation chain nearest to you and the loop edge farthest away.
- Fold the foundation edge up at the first marker, so it lies along the second marker. The doubled section is the pocket, 6 in (15 cm) deep.
- Pin or clip the two side edges of the pocket.
- Join yarn at the bottom fold of one side. Working through both layers, sc up the side, placing one sc in each pair of row ends, to the top of the pocket. Fasten off. Repeat on the other side, again starting from the bottom fold so both seams look alike.
A single crochet seam leaves a small ridge on the outside that frames the bag neatly. For an invisible join, whip stitch the edges with a yarn needle instead.
Make the strap
The strap is worked the long way, which is quicker than turning dozens of tiny rows.
Chain until the chain measures about 44 in (112 cm) without stretching it. At this gauge that is roughly 175 chains; the exact number does not matter.
Row 1: sc in the 2nd ch from the hook and in each ch across.
Row 2: ch 1, turn, sc in each sc across. Fasten off, leaving a 12 in (30 cm) tail for sewing.
A narrow crochet strap lengthens once the bag is loaded, so 44 in (112 cm) is a starting point that suits many adults of average height rather than a rule. Hold the strap against your body before sewing it on, and check the crossbody strap length guide for how to measure yourself and how much growth to allow.
Attach the strap
Place each end of the strap inside the bag at the top of a side seam, overlapping the bag by about 3/4 in (2 cm). Sew around all four sides of the overlap with the yarn tail, then stitch across it once more. The whole weight of the bag hangs from these two small patches, so do not stop at a single line of stitches. Make sure the strap is not twisted before you sew the second end.
Sew on the button
Close the flap and let the loop lie flat against the front. Mark the spot at the far end of the loop; it will sit in the center of the front, about 1 1/2 in (4 cm) above the bottom fold. Sew the button there with sewing thread, wrapping the thread a few times under the button to form a short shank so the loop has room to sit beneath it.
Watch out
Sew the button to the front layer only. It is easy to catch the back of the bag with the needle and stitch the pocket shut.
A button and loop is the simplest fastening for a flap, but a magnetic snap or a toggle works as well; the options are compared in the guide to crochet bag closures.
Adjustments
- Wider or narrower: the starting chain is the number of stitches you want plus 1. Each 4 stitches adds about 1 in (2.5 cm). For the loop row, subtract 4 from your stitch count and split the remainder evenly on both sides of the loop.
- Taller: lengthen the front and back by the same amount and leave the flap as it is.
- Smaller: for a pouch that carries only a phone, the seamless crochet phone bag is a better fit than a scaled-down envelope.
- Lined: single crochet at this gauge holds coins and keys, but a fabric lining stops the bag from stretching and gives it a cleaner inside. Follow the steps for lining a crochet bag and attach the lining before you sew on the strap.
Care
Cotton bags can usually be hand washed in cool water and dried flat. Reshape the bag while it is damp, press the fold lines with your fingers, and let it dry fully before hanging it by the strap, since wet cotton stretches under its own weight.
Frequently asked questions
Can the flap be made longer so it covers the whole front?
Yes. Work the panel to 18 in (46 cm) instead of 16 in (40 cm) and the flap will reach the bottom of the bag. Sew the button lower on the front, or on the underside of the base fold, so the loop still reaches it.
Why are the edges of the panel uneven?
Wavy or stepped edges nearly always mean the stitch count is changing. Count 32 stitches at the end of each row until the first and last stitches are easy to recognize, and keep the turning chain loose enough that it does not pull the edge in.
Does this bag work in acrylic yarn?
It can be made in acrylic, but the fabric will be softer and the strap will usually stretch more than cotton. If you use it, go down a hook size and consider lining both the bag and the strap.