Crochet Shoulder Bag Pattern: A Slouchy Hobo Bag With a Built-In Strap
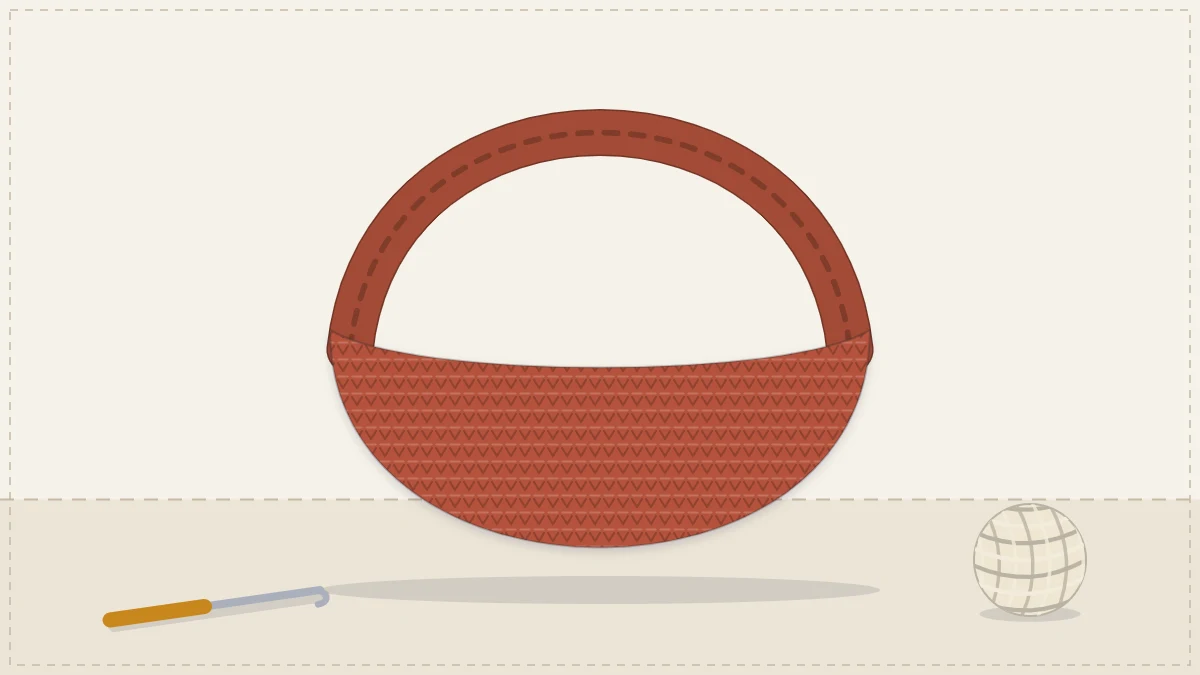
A slouchy hobo-style shoulder bag worked in the round, then split into two halves that taper by decreases into one wide strap joined at the shoulder.
Tutorial at a glance
Materials
- Worsted (#4) cotton or cotton-blend yarn, about 260 yd (240 m)
- US H-8 (5 mm) crochet hook
- 3 stitch markers
- Yarn needle
- Scissors
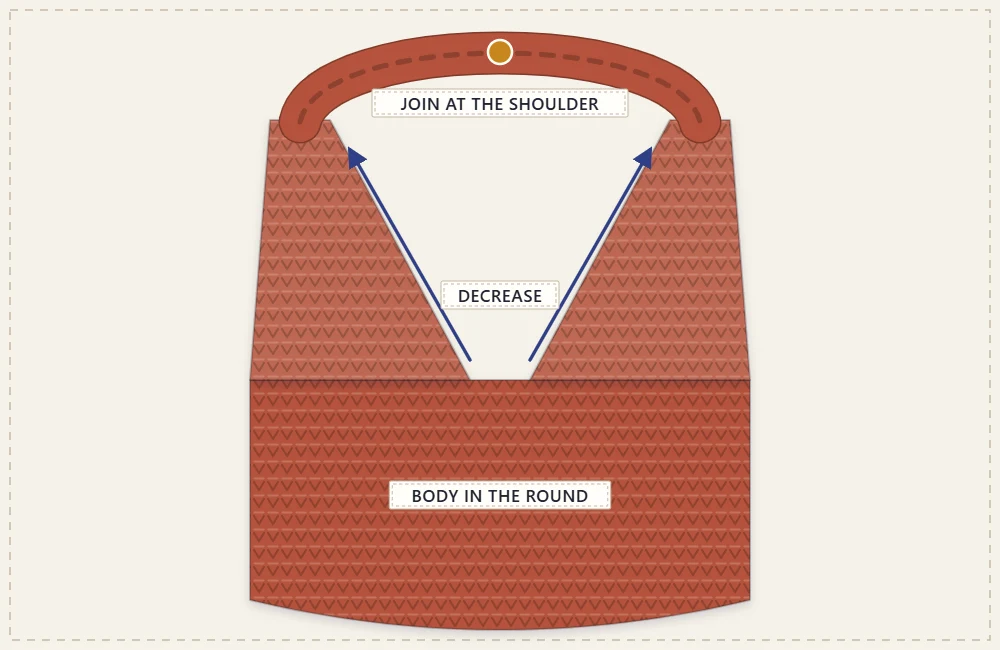
The crescent shape of a hobo bag comes from one idea: the strap is not added to the bag, it grows out of it. The body is worked as a plain tube, then the top is split into two halves that each taper upward until only a strap’s width is left. Join the two narrow ends at the shoulder and the bag is finished.
This pattern uses half double crochet throughout, which drapes more softly than single crochet and suits a slouchy bag. The only shaping stitch is a simple decrease worked at each end of a row.
Materials and gauge
- Worsted (#4) cotton or cotton-blend yarn, about 260 yd (240 m)
- US H-8 (5 mm) crochet hook
- Three stitch markers, a yarn needle and scissors
Gauge: 13 half double crochet and 10 rows = 4 in (10 cm). That is firmer than a yarn label usually recommends, which is what a bag needs. If your swatch has more than 13 stitches to 4 in (10 cm) the bag will be smaller; fewer, and it will be larger and looser.
Finished size: about 14.5 in (37 cm) wide, with a body 7 in (18 cm) deep and roughly 18 in (46 cm) from the base to the top of the strap before any stretching.
Stitches used
US terms: chain (ch), slip stitch (sl st), single crochet (sc) and half double crochet (hdc).
Half double crochet two together (hdc2tog): yarn over, insert the hook in the next stitch and pull up a loop (3 loops on the hook); yarn over, insert the hook in the following stitch and pull up a loop (5 loops on the hook); yarn over and pull through all 5 loops. Two stitches become one.
The body
The bag starts with a foundation chain worked along both sides, which closes the bottom without a seam.
- Ch 49.
- Round 1: Hdc in the 2nd ch from the hook and in each of the next 47 chains (48 hdc). Rotate the work so the unused side of the chain is on top and hdc in each of the 48 chains along that side. (96 hdc)
- Do not join. Place a marker in the first stitch of the round and move it up as you go.
- Round 2 onward: Hdc in each stitch around, in a continuous spiral. (96 hdc)
- Repeat until the body measures 7 in (18 cm) from the foundation chain, ending at the marker.
There are no increases, so the bottom is a flat fold like the base of an envelope. The start of the round sits at one side fold of the bag; the other side fold is 48 stitches further on. A round-bottomed alternative is the crochet bucket bag.
Dividing for the two sides
Each tapering half has to be centered on a side fold, so the split happens at the center front and center back, not at the folds.
- From the round marker, hdc in the next 24 stitches. The hook is now at the center front. Place a marker here.
- Count 48 stitches further along and place another marker between the 48th and 49th stitch. This is the center back.
The 96 stitches are now divided into two groups of 48, each with a side fold in its middle.
First side
From here the work is turned at the end of every row. The ch 1 at the start of a row does not count as a stitch.
- Row 1: Without turning, hdc2tog, hdc in the next 44 stitches, hdc2tog. Turn, leaving the remaining 48 stitches unworked. (46 hdc)
- Row 2: Ch 1, hdc2tog, hdc in each stitch to the last 2 stitches, hdc2tog, turn. (44 hdc)
- Rows 3 to 18: Repeat Row 2. Every row has 2 fewer stitches than the one before.
| After row | Stitches | After row | Stitches | After row | Stitches |
|---|---|---|---|---|---|
| 1 | 46 | 7 | 34 | 13 | 22 |
| 2 | 44 | 8 | 32 | 14 | 20 |
| 3 | 42 | 9 | 30 | 15 | 18 |
| 4 | 40 | 10 | 28 | 16 | 16 |
| 5 | 38 | 11 | 26 | 17 | 14 |
| 6 | 36 | 12 | 24 | 18 | 12 |
After Row 18 there are 12 stitches, about 3.5 in (9 cm) across. Continue straight for the strap:
- Strap rows: Ch 1, hdc in each stitch across, turn. (12 hdc)
- Repeat until the straight section measures 4 in (10 cm). Fasten off.
Second side
With the outside of the bag facing, join the yarn in the first unworked stitch beside the first side, at the center back marker. Ch 1 and work Row 1 over the 48 remaining stitches: hdc2tog, hdc in the next 44 stitches, hdc2tog (46 hdc). Then work Rows 2 to 18 and the strap rows exactly as for the first side. Leave a 16 in (40 cm) tail when fastening off.
Joining and edging
- Hold the two strap ends together with the outsides of the bag facing each other and check that neither half is twisted.
- Whip stitch across all 12 stitches with the tail, then stitch back across the seam a second time.
- Turn the seam to the inside. Join yarn at the center front and work one round of sc evenly around the front arch: up one slope, over the strap edge and down the other slope. About 3 sc for every 2 row ends keeps the edge flat. Join with a sl st and fasten off.
- Repeat around the back arch.
The edging keeps the stretchy row ends of the opening and strap from growing. For a strap that must not lengthen at all, see the reinforcing methods in the guide to crochet bag straps.
Watch out
Cotton half double crochet drops under load, so the bag will hang lower once it is in use. If you prefer it higher under the arm, work only 2 in (5 cm) of straight strap rows on each side.
Adjusting the size and finishing
- Wider or narrower: change the foundation chain. Use any even number of stitches per side, so that the center front falls between two stitches. With 44 per side (ch 45, 88 stitches in total), work 22 stitches to reach the center front; each half then starts at 44 and reaches 12 stitches after 16 rows instead of 18.
- Deeper: work more rounds before dividing.
- Strap drop: the strap length guide shows how to measure where a bag should sit on your own body.
The opening on a hobo bag is wide, and small items slip out of soft fabric easily. A fabric lining with a pocket solves both problems; see how to line a crochet bag.
Frequently asked questions
Why is the bag divided at the center front and back instead of at the sides?
Each tapering half has to rise from a side of the bag so that the strap runs from one side over the shoulder to the other. Splitting at the centers leaves a side fold in the middle of each half.
Can the bag be worked in single crochet instead?
Yes, but the gauge changes, so the chain length and the number of decrease rows need recalculating from a swatch. Single crochet also gives a stiffer, less slouchy fabric.
How is the opening kept closed?
A magnetic snap or a button and loop at the center front and back, just below the edging, is the usual answer. Add any closure before sewing in a lining.