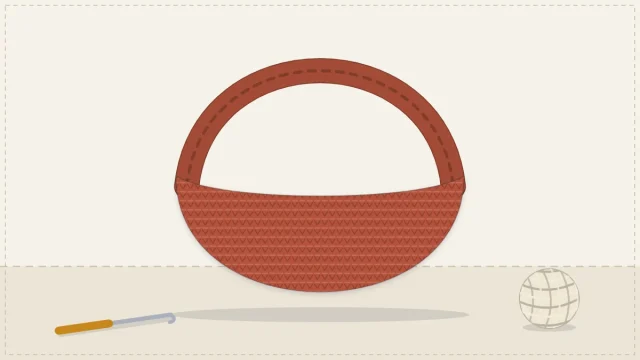
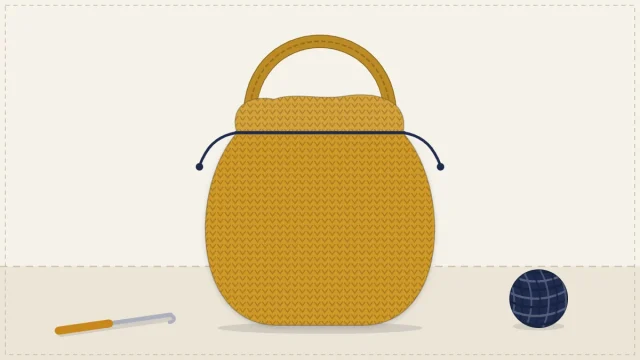
Granny Square Bag: The Classic 13-Square Shoulder Bag
How to make the classic granny square bag from 13 squares: the four-round square, the staircase layout, every seam in order, the pointed top edge and the strap.

Tutorial at a glance
Materials
- Worsted (#4) cotton or cotton-blend yarn, about 350 yd (320 m) in total
- US H-8 (5 mm) crochet hook
- Yarn needle
- Scissors
- Locking stitch markers or clips for holding seams
Thirteen granny squares, arranged like a short staircase and folded at each step, make a bag with no cutting, no shaping and no pattern pieces. The squares end up set on point, the top edge rises to two corners that carry the strap, and the front and back dip into a V between them. The crochet is easy; the layout is what needs care.
Materials and gauge
- Worsted (#4) cotton or cotton-blend yarn, about 350 yd (320 m) in total, in one color or several
- US H-8 (5 mm) crochet hook
- Yarn needle, scissors and a few locking stitch markers or clips
Gauge: one four-round square = 5 in (12.5 cm) across after blocking. Consistency matters more than the exact size: all 13 squares must match. Expect each to take roughly 22 yd (20 m).
Finished size: roughly 14 in (36 cm) across and 15 in (38 cm) from the strap corners to the base.
The classic granny square
US terms: chain (ch), slip stitch (sl st), single crochet (sc) and double crochet (dc). A cluster is 3 dc worked into the same space. The ch 3 at the start of each round counts as the first dc, and every round is joined with a sl st in the top of it.
- Round 1: Ch 4 and sl st in the first chain to form a ring. Ch 3, 2 dc in the ring, ch 2. [3 dc in the ring, ch 2] 3 times. Join. (4 clusters, 4 corner spaces)
- Round 2: Sl st in the next 2 dc and into the corner space. Ch 3, (2 dc, ch 2, 3 dc) in the same space, ch 1. [(3 dc, ch 2, 3 dc) in the next corner space, ch 1] 3 times. Join. (8 clusters)
- Round 3: Sl st to the corner space as before. Ch 3, (2 dc, ch 2, 3 dc) in the same space, ch 1, 3 dc in the next ch-1 space, ch 1. [(3 dc, ch 2, 3 dc) in the next corner space, ch 1, 3 dc in the next ch-1 space, ch 1] 3 times. Join. (12 clusters)
- Round 4: Sl st to the corner space. Ch 3, (2 dc, ch 2, 3 dc) in the same space, ch 1, [3 dc in the next ch-1 space, ch 1] twice. *(3 dc, ch 2, 3 dc) in the next corner space, ch 1, [3 dc in the next ch-1 space, ch 1] twice; repeat from * 2 more times. Join and fasten off. (16 clusters)
After Round 4 every side has 4 clusters between two corner spaces.
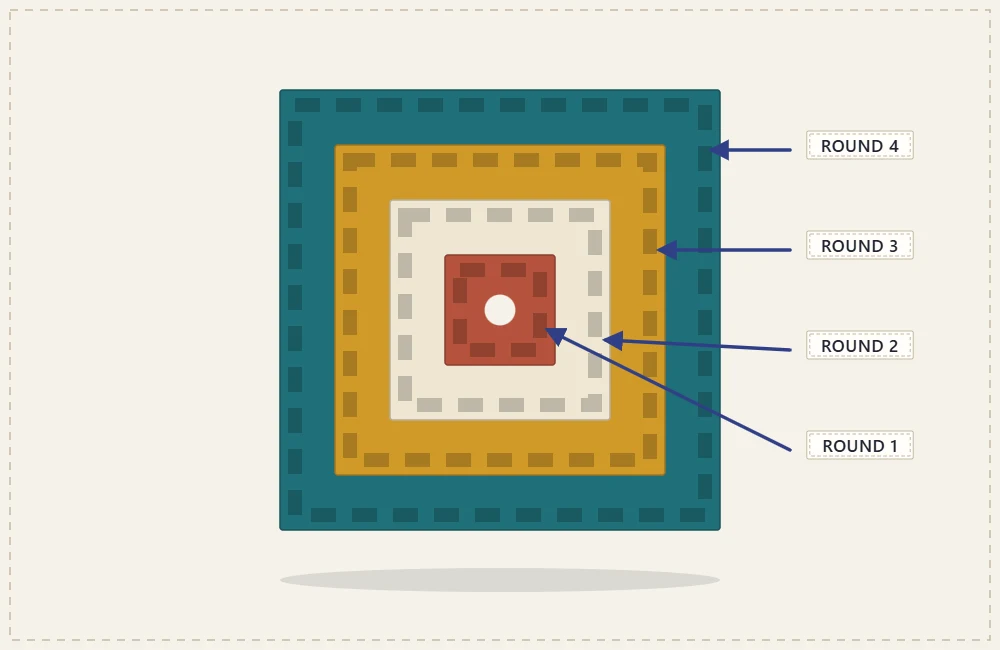
Make 13 squares. To change color between rounds, fasten off and join the new yarn in any corner space. Weave in every end and block the squares to the same size before joining.
The 13-square layout
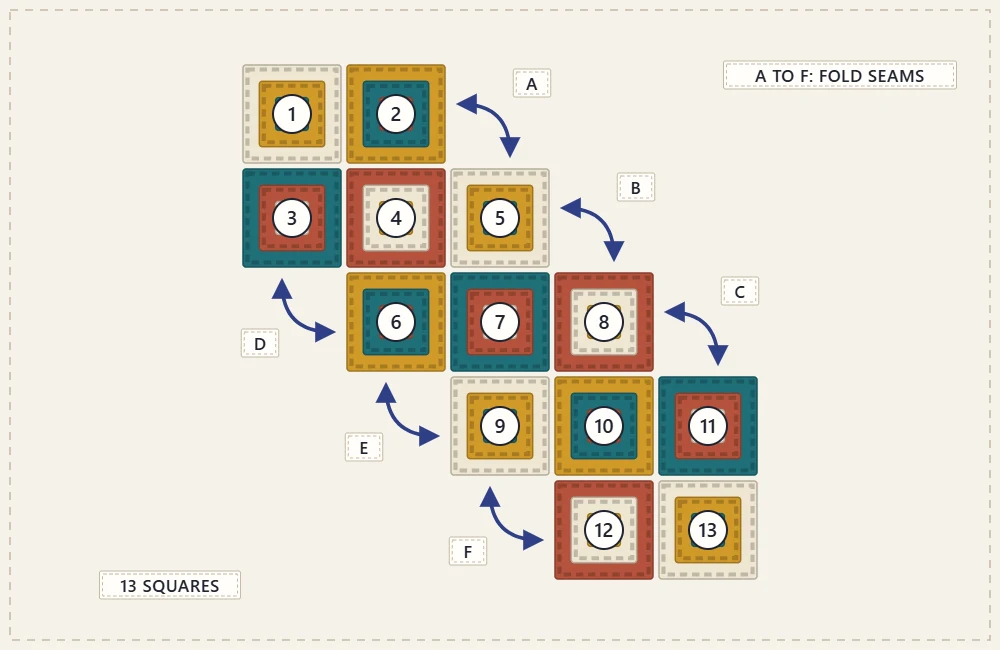
Lay the squares out flat, right side up, in five rows. The first and last rows have 2 squares, the three middle rows have 3, and from the third row on each row starts one square further to the right.
| Column 1 | Column 2 | Column 3 | Column 4 | Column 5 | |
|---|---|---|---|---|---|
| Row 1 | 1 | 2 | – | – | – |
| Row 2 | 3 | 4 | 5 | – | – |
| Row 3 | – | 6 | 7 | 8 | – |
| Row 4 | – | – | 9 | 10 | 11 |
| Row 5 | – | – | – | 12 | 13 |
Squares 1, 4, 7, 10 and 13 run down the diagonal and become the sides and base of the bag. Squares 2, 5, 8 and 11 form one face; squares 3, 6, 9 and 12 form the other.
Joining, stage one: the flat piece
Join every pair of edges that touch in the layout. There are 16 of these seams:
- Side by side (8): 1 to 2, 3 to 4, 4 to 5, 6 to 7, 7 to 8, 9 to 10, 10 to 11, 12 to 13.
- Above and below (8): 1 to 3, 2 to 4, 4 to 6, 5 to 7, 7 to 9, 8 to 10, 10 to 12, 11 to 13.
Whip stitch with the squares right sides together, matching corner space to corner space and stitch to stitch. Other seams, and when each suits, are described in how to assemble and finish a crochet bag.
Joining, stage two: folding the steps
At each inside corner of the staircase, two free edges meet at a right angle. Fold the piece so those two edges lie together and seam them. There are 6 of these seams:
| Seam | Join this edge | To this edge |
|---|---|---|
| A | Right edge of square 2 | Top edge of square 5 |
| B | Right edge of square 5 | Top edge of square 8 |
| C | Right edge of square 8 | Top edge of square 11 |
| D | Bottom edge of square 3 | Left edge of square 6 |
| E | Bottom edge of square 6 | Left edge of square 9 |
| F | Bottom edge of square 9 | Left edge of square 12 |
Start each seam at the inside corner and work outward. After seams A, B and C, squares 2, 5, 8 and 11 meet at a single point; squares 3, 6, 9 and 12 do the same after seams D, E and F. Those two points are the bottoms of the V at the front and back of the opening.
The top edge and strap
Eight edges stay open: the top and left of square 1, the top of square 2, the left of square 3, the right of square 11, the bottom of square 12, and the right and bottom of square 13. They form one continuous rim with two outer corners, on squares 1 and 13. Held by those corners, the bag hangs with every square on point.
- Edging: Join yarn anywhere on the rim. Sc in each dc and each ch-1 space around, with 1 sc in each corner space beside a seam and 3 sc in each of the two outer corner spaces. Join with a sl st and fasten off.
- Strap: Ch 6. Sc in the 2nd ch from the hook and in each chain across, turn (5 sc). Ch 1 (does not count as a stitch), sc in each stitch across, turn (5 sc). Repeat the last row until the strap measures 24 in (61 cm).
- Sew one strap end to the inside of each outer corner, overlapping by 1 in (2.5 cm) and stitching around the whole overlap.
A granny square bag stretches a good deal, and so does its strap, so start shorter than seems right. The guide to crochet bag straps shows how to make one that holds its length.
Granny clusters leave gaps wide enough for pens and keys to work through, so a fabric lining is close to essential. Measure the assembled bag before cutting anything, as explained in how to line a crochet bag.
Frequently asked questions
Can the squares have three rounds instead of four?
Yes. The layout and all 22 seams stay the same; only the size changes. Three-round squares in worsted yarn are usually a little under 4 in (10 cm), which makes a noticeably smaller bag.
Do the squares need blocking before joining?
It helps a great deal. Pinning each damp square to the same measurement makes the edges equal in length, so the seams lie flat and the corners meet.
Which join is strongest for a bag?
A firm whip stitch or a single crochet seam both hold well if every stitch is caught. Avoid loose decorative joins with long chains between squares, because they stretch under load.
Why do four squares meet at the bottom of each V?
The three fold seams on each face fan four squares around one point, and the two unseamed edges at that point form the V. If only three meet there, one of the fold seams has been paired with the wrong edge.