How to Crochet a Bag: A Beginner’s Roadmap
Crochet bags are built in three ways: a folded flat panel, a tube worked in the round, or joined motifs. Here is what each one needs and which to make first.
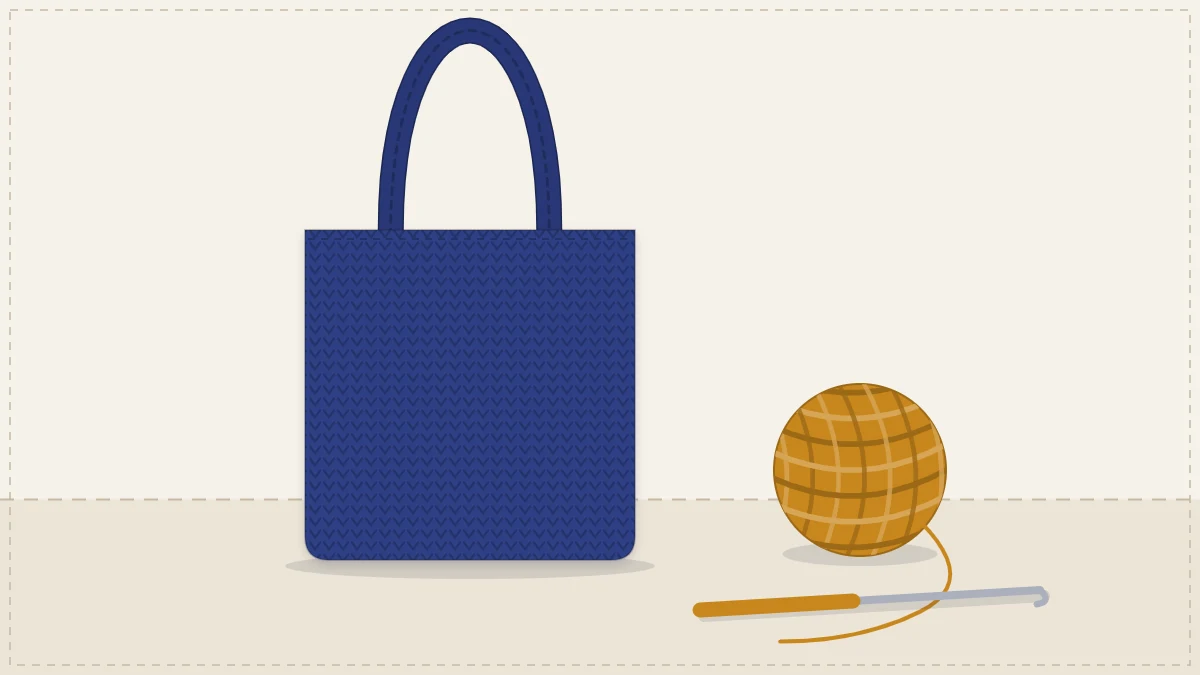
Every crochet bag, from a coin purse to a beach tote, is built in one of three ways: a flat piece that is folded and seamed, a tube worked in the round from a base, or small motifs joined together. Once you can tell them apart, you know what a pattern will ask of you before you buy any yarn.
None of the three is hard. A first bag needs a chain (ch), a single crochet (sc), a yarn needle and some patience with counting.
The three ways a crochet bag is built
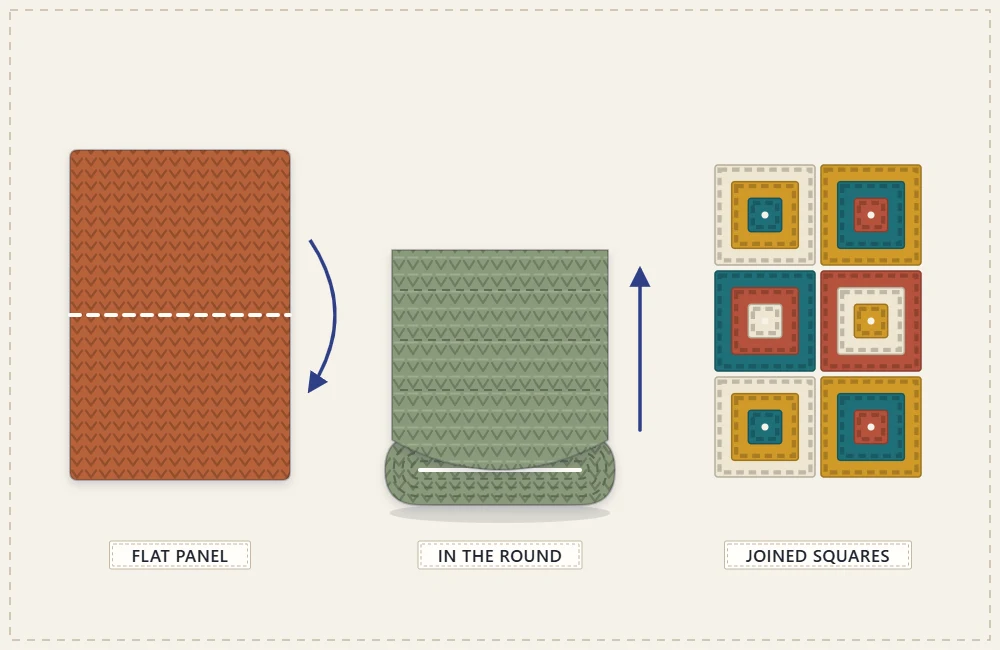
1. A flat panel, folded and seamed
You crochet a rectangle back and forth in rows, fold it in half and sew up the two sides. The fold becomes the bottom of the bag, so there is no base to shape and nothing to increase. Straps are made separately and sewn on.
Skills needed: a foundation chain, one stitch worked in rows, turning at the end of a row, and a simple whip stitch seam. The only real risk is losing or gaining a stitch at the edges, which a quick count every few rows prevents.
2. Worked in the round from a base
You start with a flat base, either a circle, an oval or a rectangle, and then stop increasing so the fabric turns upward and becomes the sides. The bag grows as a seamless tube, and handles can be made in the last few rounds by chaining across a gap. There is usually nothing to sew at all.
Skills needed: working in rounds, increasing (two stitches in one), using a stitch marker to track the start of the round, and reading a stitch total at the end of each round. The base is the only part that takes concentration; the sides are pure repetition.
3. Joined motifs
You make a set of small pieces, most often granny squares, and join them into a bag shape. Each motif is quick and portable, and color changes are easy because every square is its own little project. The cost is finishing: more ends to weave in and more joining.
Skills needed: double crochet (dc), working into chain spaces, changing colors, and joining squares neatly. Motif fabric is open and stretchy, so these bags are usually lined.
The three methods compared
| Construction | Main skills | Sewing involved | Best for |
|---|---|---|---|
| Flat panel | Chain, one stitch in rows | Two side seams plus straps | A very first bag, pouches, flat crossbody bags |
| In the round | Rounds, increases, stitch marker | Little or none | Totes, bucket bags, market bags |
| Joined motifs | Double crochet, color changes, joining | A lot of joining and ends | Granny square bags, using up leftover yarn |
Supplies to gather
A bag asks more of its materials than a scarf does, because it has to carry weight without sagging. The list is still short:
- Yarn: worsted (#4) cotton is the standard starting point. It has almost no stretch, shows stitches clearly and washes well. Choose a light or medium solid color so you can see where the hook goes. The guide to the best yarn for crochet bags covers blends, raffia and T-shirt yarn.
- Hook: one or two sizes smaller than the yarn label suggests. For worsted cotton that usually means a US G-6 (4 mm) to US H-8 (5 mm) hook.
- Stitch markers: at least two locking markers. A scrap of contrasting yarn works in a pinch.
- Yarn needle: a blunt needle with a large eye for seams and for weaving in ends.
- Scissors and a tape measure.
Optional extras come later: fabric for a lining, a button or magnetic snap, a stiff insert for the base. None of them is needed for a first bag.
Why bag gauge is tighter than normal
The hook size printed on a yarn label is chosen for soft, draping fabric. A bag needs the opposite. If you can poke a fingertip between the stitches, keys and pens will find their way out and the bag will lengthen when it is loaded.
Work a small swatch, about 4 in (10 cm) square, and hold it up to the light. Firm fabric with small gaps is the goal. If it looks loose, drop a hook size and try again. If your hand aches and the hook will not go into the stitches, go back up. Stitch choice matters as much as hook size; the roundup of sturdy stitches for bags explains which ones give the firmest fabric.
Tip
Count your stitches at the end of every row or round for the first few inches. Most crooked bags come from one missed stitch at an edge, repeated row after row, and counting catches it while it is still a ten-second fix.
Which bag to make first
Start with the flat panel. It uses one stitch, has no shaping and teaches the things every later bag relies on: even tension, straight edges and a secure seam. The first crochet bag tutorial is exactly that, a single crochet rectangle folded in half with two simple straps.
Make the second bag in the round. The step up is small, since you already know the stitch, and it adds increasing and working in a spiral. The easy bag in the round has an oval base and handles that are crocheted in as you go, so there is nothing to sew.
Leave motif bags for third place. They are not technically harder, but they involve more pieces, more ends and a lining, and they are far more enjoyable once seaming already feels routine.
What to expect along the way
- Time: a small flat bag is usually a matter of a few evenings for a beginner. Single crochet is dense and slow, and that density is what makes the bag last.
- Sore hands: tight cotton fabric is harder on the hands than loose acrylic. Take breaks, and do not grip the hook harder than you need to.
- Stretch: every crochet bag grows a little in length once it carries weight. Solid stitches grow slightly and mesh grows a lot. Patterns allow for it, and so should you when judging the finished size.
- Straps: they stretch more than the body does. Making them a bit shorter than the length you want is normal practice.
- Finishing: weaving in ends properly takes longer than expected and is worth every minute. Cotton is slippery, and a short tail will work loose.
Pick a yarn you like the feel of, swatch until the fabric is firm, and begin with the rectangle. The skills stack quickly: by the third bag, the choice between rows, rounds and motifs comes down to the shape you want rather than what you are able to make.
Frequently asked questions
What is the easiest type of crochet bag to make?
A flat rectangle in single crochet, folded in half and seamed at the sides. It uses one stitch, needs no increases and has only two short seams.
Do I need to know how to increase to crochet a bag?
Not for a flat panel bag. Increases are only needed when a bag starts from a base worked in the round, such as a circle, oval or rectangle.
Can I use acrylic yarn for a first bag?
You can practice with it, but acrylic stretches more than cotton, so the bag will sag sooner when loaded. Worsted cotton is the more reliable choice for a bag that will be used.
Does a crochet bag need a lining?
A bag in firm single crochet works fine without one. Open or stretchy fabric, such as granny squares or mesh, benefits from a lining if small items will be carried.