Crochet Drawstring Bag: A Small Pouch That Cinches Shut
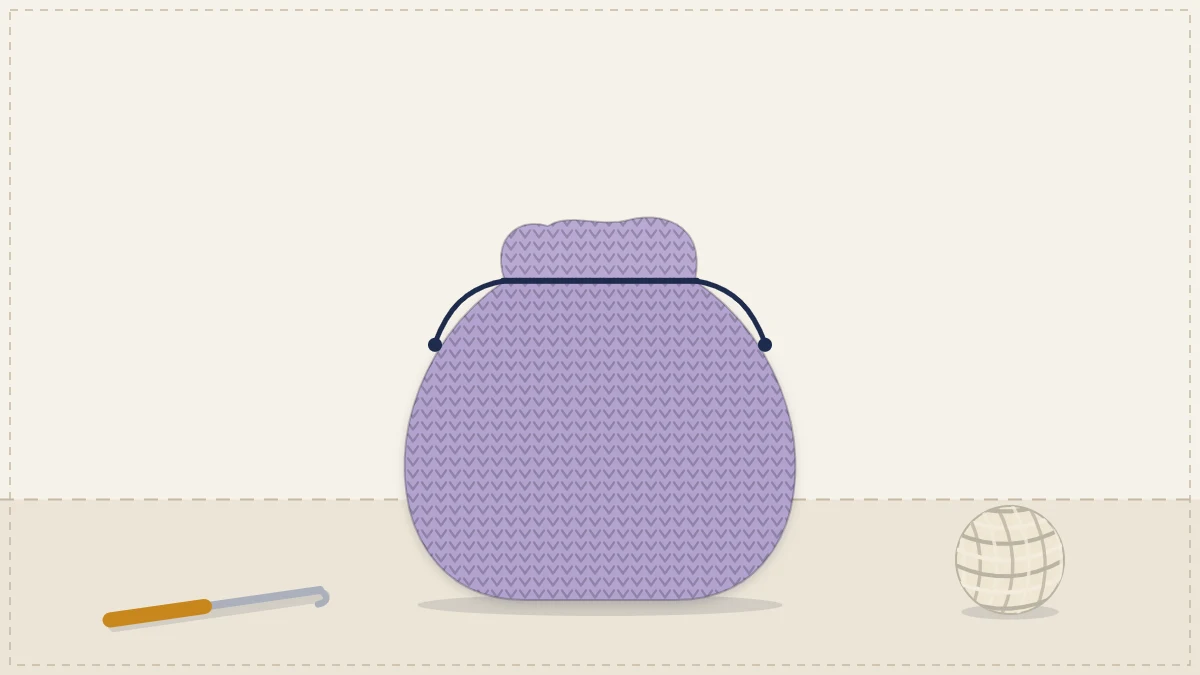
A small round pouch with a flat circle base, an eyelet round and two cords pulled from opposite sides so the top closes completely.
Tutorial at a glance
Materials
- Worsted (#4) cotton yarn, roughly 60 yd (55 m)
- US G-6 (4 mm) crochet hook
- Locking stitch marker
- Yarn needle
- Safety pin or bodkin for threading the cords
- Scissors
What makes a drawstring pouch close properly is not the pouch but the cords. One cord gathers the top into a loose pucker; two cords, pulled from opposite sides, cinch it completely shut and hold it there. This small round pouch is built around that idea, with an eyelet round planned so both cords thread cleanly.
It works up in an evening and suits gifts, dice, jewelry, earbuds or a handful of stitch markers.
Materials and gauge
- Worsted (#4) cotton, roughly 60 yd (55 m)
- US G-6 (4 mm) hook
- Locking stitch marker, yarn needle, scissors
- A safety pin or bodkin for threading the cords
Gauge: 16 single crochet (sc) and 18 rounds = 4 in (10 cm). This is firmer than the yarn label is likely to suggest, which keeps small items from working their way through the fabric. Exact gauge is not critical for a pouch, but a loose fabric will be floppy.
Finished size: about 4 1/2 in (11.5 cm) wide when laid flat and 4 3/4 in (12 cm) tall.
Base
The base is a flat circle worked in a continuous spiral. Do not join the rounds; place the marker in the first stitch of each round and move it up as you go.
Round 1: make a magic ring and work 6 sc into it. Pull the ring closed. (6 sc)
Round 2: 2 sc in each sc around. (12 sc)
Round 3: *sc in the next sc, 2 sc in the next sc; repeat from * around. (18 sc)
Round 4: *sc in the next 2 sc, 2 sc in the next sc; repeat from * around. (24 sc)
Round 5: *sc in the next 3 sc, 2 sc in the next sc; repeat from * around. (30 sc)
Round 6: *sc in the next 4 sc, 2 sc in the next sc; repeat from * around. (36 sc)
The circle should lie flat and measure about 2 3/4 in (7 cm) across. If it ruffles or cups, the fixes are in the guide to crochet bag base shapes.
Sides
Round 7: working in the back loop only, sc in each sc around. (36 sc)
The back-loop round makes a crisp turn from base to side, so the pouch sits flat on a table.
Round 8 onward: working through both loops again, sc in each sc around (36 sc). Repeat until the sides measure 3 1/2 in (9 cm) from the back-loop round.
At the end of the last round, slip stitch (sl st) in the next sc to level off the spiral. The remaining rounds are joined.
Eyelet round and top
Eyelet round: chain (ch) 3 (counts as the first double crochet), double crochet (dc) in the next sc, ch 1, skip the next sc, *dc in the next 2 sc, ch 1, skip the next sc; repeat from * 10 more times. Join with a sl st in the top of the beginning ch-3. (24 dc and 12 ch-1 spaces)
The repeat uses 3 stitches, and 12 repeats use all 36. Count the eyelets before going on: there should be exactly 12.
Next round: ch 1 (does not count as a stitch), sc in the same stitch as the join, sc in each dc and in each ch-1 space around. Join with a sl st in the first sc. (36 sc)
Last 2 rounds: ch 1, sc in each sc around, join with a sl st in the first sc. (36 sc)
Fasten off and weave in the ends. The three rounds above the eyelets form the small frill that stands up when the pouch is closed.
Cords
Make 2. For each cord, leave a short tail, chain until the chain measures about 20 in (50 cm) without stretching, then turn and sl st in each chain all the way back. Fasten off. The return row of slip stitches roughly doubles the thickness and stops the cord from curling. Do not weave in the tails yet.
Thread the two cords
Lay the pouch flat. Pick the eyelet at one folded edge and call it eyelet 1, then count around: eyelet 7 will be at the opposite fold.
- First cord. Fasten a safety pin to one end. Starting from the outside, go in through eyelet 1, out through eyelet 2, in through 3, and continue weaving in and out all the way around. The cord comes out through eyelet 12, right next to where it started. Both ends are now on the outside, on the same side of the pouch.
- Second cord. Start at eyelet 7. Go in through 7, out through 8, and continue around in the same direction, following the same in-and-out path as the first cord, past eyelet 12 and on through 1 to 6. It comes out through eyelet 6, next to where it started.
- Knot. Even up each cord, then tie its two ends together with an overhand knot about 1 in (2.5 cm) from the tips. Trim the tails or thread them back into the cord.
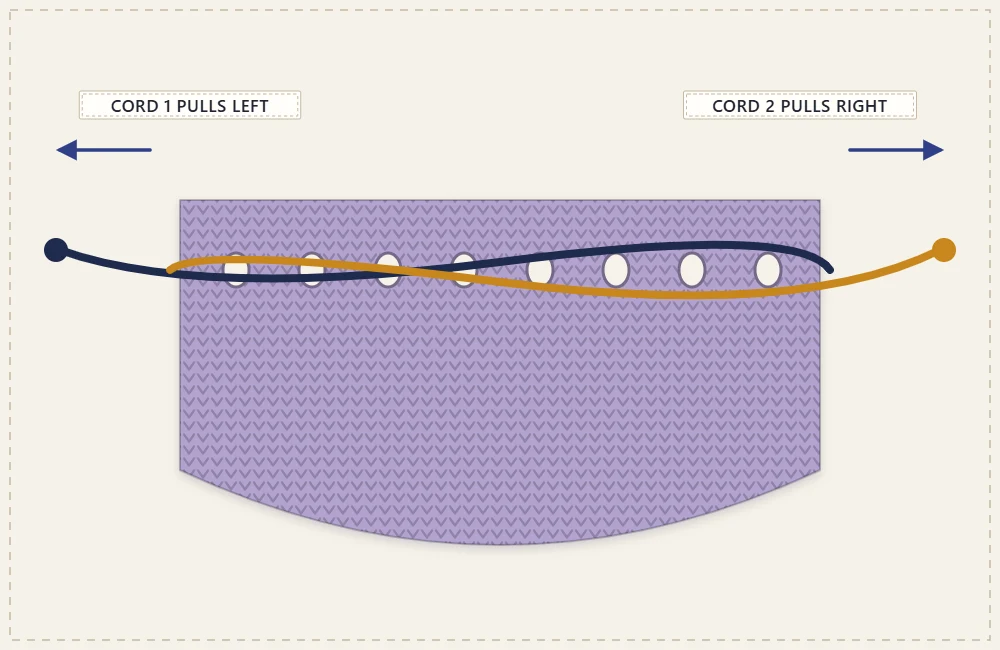
Hold one knot in each hand and pull them apart. The opening closes evenly and stays closed, because each cord is working against the other. To open the pouch, put two fingers inside the gathered top and spread them.
Watch out
Both cords must go in and out through the same eyelets in the same order. If the second cord is woven the opposite way, the two cross between every pair of posts and the top jams instead of sliding.
Changing the size
The eyelet repeat needs a multiple of 3 stitches, and the two-cord threading works out cleanly when the number of eyelets divides by 4. Both conditions are met when the stitch count is a multiple of 12, which a single crochet circle reaches every second round.
| Size | Base rounds | Stitches | Eyelets | Flat width | Second cord starts at |
|---|---|---|---|---|---|
| Small | 4 | 24 sc | 8 | 3 in (7.5 cm) | Eyelet 5 |
| Medium | 6 | 36 sc | 12 | 4 1/2 in (11.5 cm) | Eyelet 7 |
| Large | 8 | 48 sc | 16 | 6 in (15 cm) | Eyelet 9 |
For the large size, continue the base in the same pattern: Round 7 has 5 sc between increases (42 sc) and Round 8 has 6 (48 sc). Work the sides to any height, and make each cord at least twice the flat width plus 10 in (25 cm).
Where to go from here
The same construction, scaled up and given a shoulder strap, becomes a crochet bucket bag. For holiday wrapping there is a set of crochet gift bags in three sizes, and a drawstring is only one of several ways to shut a bag, all compared in the guide to crochet bag closures.
Frequently asked questions
Why use two cords instead of one?
A single cord gathers the opening but tends to slide back open. Two cords that exit on opposite sides pull against each other, so the top closes tightly and stays closed.
Can ribbon be used instead of crocheted cords?
Yes. A ribbon up to about 3/8 in (10 mm) wide passes through these eyelets, and it slides more easily than a crocheted cord. Cut each piece to the same length as the cords and seal or hem the ends.
Will small beads or coins fall through the fabric?
At the stated gauge, single crochet in worsted cotton holds coins and dice. For tiny beads or fine chains, go down a hook size or add a simple fabric lining.