Crochet Bag Base Shapes: How to Make a Circle, Oval or Rectangle
The increase formulas behind circle, oval and rectangular bag bases, how to keep a base flat, and how to turn the corner into the sides.
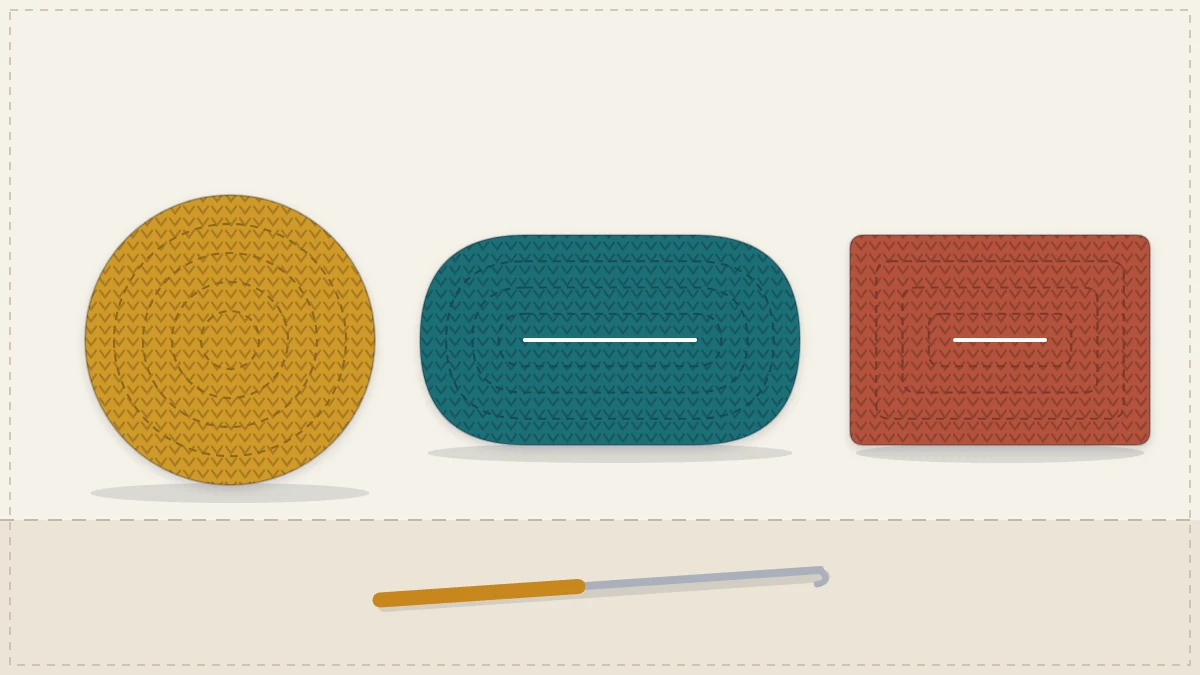
Every bag worked in the round starts from one of three bases: a circle, an oval or a rectangle. The base sets the footprint of the bag, and its final stitch count becomes the stitch count of the sides, so getting it flat and getting it the right size are the same job.
All three shapes run on simple increase formulas, and with those a base can be made to any size without a pattern.
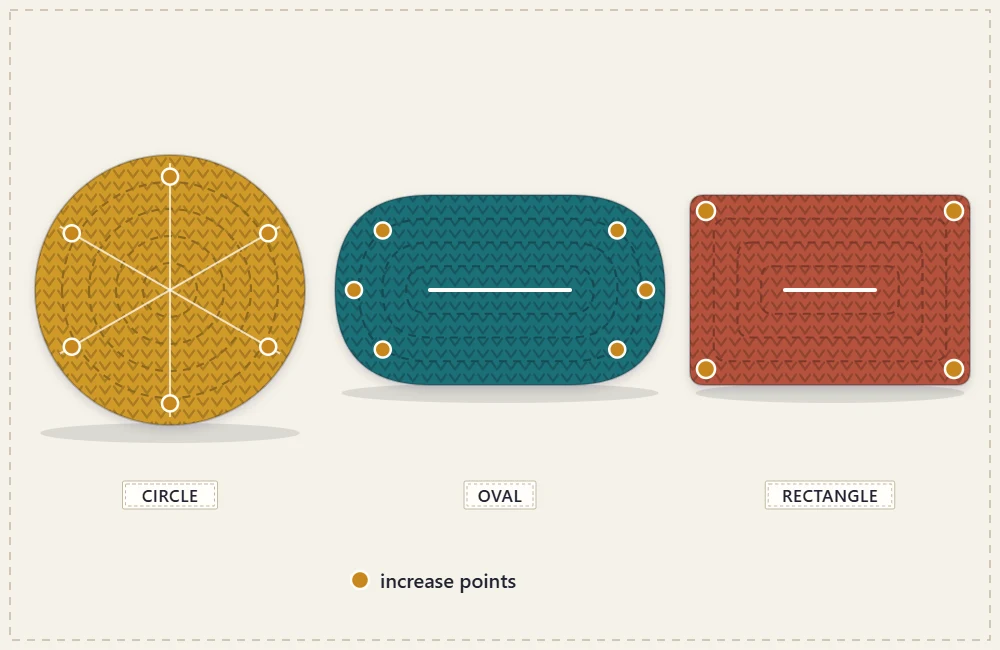
The circle base
A flat circle grows by the same number of stitches in every round, and that number depends on how tall the stitch is. Taller stitches add more width per round, so they need more increases to stay flat.
| Stitch | Stitches in round 1 | Added each round | First five rounds |
|---|---|---|---|
| Single crochet (sc) | 6 | 6 | 6, 12, 18, 24, 30 |
| Half double crochet (hdc) | 8 | 8 | 8, 16, 24, 32, 40 |
| Double crochet (dc) | 12 | 12 | 12, 24, 36, 48, 60 |
In single crochet the rounds read like this:
- 6 sc in a magic ring. (6 sc)
- 2 sc in each stitch. (12 sc)
- *Sc in next stitch, 2 sc in next stitch; repeat from * around. (18 sc)
- *Sc in next 2 stitches, 2 sc in next stitch; repeat from * around. (24 sc)
- *Sc in next 3 stitches, 2 sc in next stitch; repeat from * around. (30 sc)
Each new round has one more plain stitch between increases, and the total is always 6 times the round number. Keep going until the circle reaches the diameter the bag needs. The bucket bag is built on exactly this kind of base.
Tip
Increases stacked on top of each other turn a circle into a hexagon. To keep it round, shift the increases on every other round: start those rounds with half of the plain stitches, work the repeats as written, and finish with the remaining plain stitches.
The oval base
An oval is a circle cut in half with a straight section in between. It is worked around both sides of a foundation chain, and the increases sit only at the two curved ends.
Chain the length of the straight section plus 1. With 20 working chains (chain 21):
- 3 sc in the 2nd chain from the hook, sc in next 18 chains, 3 sc in the last chain; turn the work and continue along the other side of the chain, sc in next 18 chains. (42 sc)
- 2 sc in each of next 3 stitches, sc in next 18 stitches, 2 sc in each of next 3 stitches, sc in next 18 stitches. (48 sc)
- *[Sc in next stitch, 2 sc in next stitch] 3 times, sc in next 18 stitches; repeat from * once. (54 sc)
- *[Sc in next 2 stitches, 2 sc in next stitch] 3 times, sc in next 18 stitches; repeat from * once. (60 sc)
The general rule for single crochet: with N working chains, round 1 has 2 x N + 2 stitches, and every later round adds 6, three at each end. Each end is half of a single crochet circle, so it follows half of the circle formula. In half double crochet add 4 at each end (8 per round), and in double crochet 6 at each end (12 per round). The straight sides never change. A full bag built this way is the easy bag in the round.
The rectangular base
A rectangle starts exactly like an oval; round 1 is the same. The difference is where the increases go afterwards: in four sharp corners in place of two smooth curves. Each corner is 3 sc worked into one stitch, which adds 2 stitches per corner and 8 per round.
Continuing from the 42-stitch round 1 above:
- Round 2: 3 sc in first stitch, sc in next stitch, 3 sc in next stitch, sc in next 18 stitches, 3 sc in next stitch, sc in next stitch, 3 sc in next stitch, sc in next 18 stitches. (50 sc)
- Round 3: sc in each stitch around, working 3 sc in the center stitch of each of the 4 corners. (58 sc)
Repeat round 3 for a larger base, adding 8 stitches each time: 66, 74, 82. Mark the center stitch of every corner with a stitch marker and move it up as the base grows; a corner worked one stitch off will make the rectangle twist.
To match a base to a planned bag width, see the guide to tote bag sizes.
Keeping a base flat
The formulas assume an average tension. Yarn, hook and hands vary, so read the fabric as it grows.
| What it does | What it means | Fix |
|---|---|---|
| Ruffles or waves at the edge | Too many stitches for the circumference | Work one round with no increases, then carry on; or go down a hook size |
| Cups into a bowl | Too few stitches | Rip back one round and repeat the previous increase round; or go up a hook size |
| Flat but floppy | Tension too loose for a bag | Restart with a hook one or two sizes smaller |
A very slight cup is harmless, since the contents press the base flat. Ruffling does not correct itself.
Turning the corner from base to sides
When the base is big enough, stop increasing. The first round with no increases makes the fabric turn upward on its own. To make that turn a crisp edge instead of a gradual curve, work this one round in the back loop only: insert the hook under the back strand of each stitch and leave the front strand free. The unused front loops form a ridge around the outside that acts as a fold line.
From the next round on, work through both loops again. The stitch count stays the same as the last base round for a straight-sided bag.
Shaping the body
The sides do not have to rise straight. Small, evenly spread changes in stitch count shape the whole bag.
- Flared: every few rounds, work an increase round that adds the same number as the base formula, for example 6 stitches spaced evenly on a single crochet circle. The more plain rounds between increase rounds, the gentler the flare.
- Tapered: do the reverse with decreases, working two stitches together at evenly spaced points. A bag that narrows toward the top holds its contents better and needs a smaller closure.
- Gusset effect on an oval or rectangle: put the increases or decreases only at the short ends, so the front and back stay flat while the ends widen or narrow.
Count the stitches at the end of each shaping round. Once the base is the right shape it is often worth stiffening; the options are covered in the guide on reinforcing a crochet bag.
Frequently asked questions
How many stitches should a crochet bag base have?
Enough to match the circumference of the finished bag. Multiply the planned distance around the bag by the stitches per inch from a gauge swatch, then stop increasing at the nearest round that reaches that total.
Why is my crochet circle ruffling?
It has more stitches than its circumference can hold, usually from too many increases or a loose tension. Work one round without increases, or switch to a smaller hook.
Is an oval or a rectangular base better for a tote?
A rectangle gives a boxy tote that stands with clear corners, while an oval gives a softer shape with no corners to wear. Both start from the same foundation chain and first round.